Onion rings. Mmmmm… Eating sliced onion raw and alone….not so much mmm…. Instead of putting pieces of raw onion in salad, I decided to get more creative. I wondered if onion rings could be made without being deep fried and instead be baked. It turns out other people already had test this idea out. Check out the owner of the recipe I used: here. Poormet’s onion ring pictures look more professional than mine! =p
By the way, anyone have tips on how to prevent tearing when cutting onions? I had to stop cutting the onion in the middle and go walk around while laughing at my tears. So.. yes, I supposed I was crying while making onion rings instead of frying them.
Ingredients
– Onion (Any onion will do. I used a yellow because it was what I had at the time. Poormet uses a medium sized one. I had no idea what a medium sized one was, but since I had to use more eggs than Poormet required, I’m guessing I didn’t use a medium sized one.)
– 1/2 cup flour
– 1/2 cup bread crumbs (or more as needed)
– 2 eggs (or more if you find out that you’re running out! The eggs are what make the bread crumbs stick to the onions, so this is important if you want nice looking onion rings!)
– Seasoning (optional – I used some Parmesan cheese, but it’s basically whatever you’d like. You can added pepper, etc).
Steps
1. Preheat oven to 450 F
2. De-skin the onion.
3. Slice onion into 1/2 inch wide rings (or whatever size you want them). Then push them out of each other to get the rings separated (since the onion has layers- each layer is another onion ring!)

Sliced Onions
4. Set aside four bowls. Make sure they’re deep enough that you can fit the onion slice in to mix.
Bowl 1: Fill with water.
Bowl 2: Flour.
Bowl 3: Beaten eggs
Bowl 4: Bread crumbs
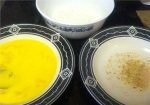
Bowls with Flour, Egg, Bread Crumbs
5. Bowl 1: Dip sliced onion rings into water. This water helps get rid of the onion smell a little bit, and it helps make the flour in the next step stick to the onion ring better. Use chopsticks of a cooking clip/claw to grasp the onion rings for each station.
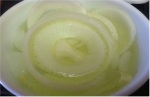
Onions in Water
6. Bowl 2: Dip onion rings into flour
7. Bowl 3: Dip onion rings into the eggs. By the way, I got lazy and used my hands in the middle. Don’t do this. The egg is what makes the breadcrumbs stick tot he onion rings. I failed in that most the bread crumbs decided to stick to me instead of the onion rings until I switched over to chopsticks.
8. Bowl 4: Cover onion rings with the breadcrumbs. You can add seasoning too. I added some parmesan cheese and some pepper for some of the onion rings.
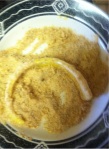
Onion in Bread Crumbs- Umm, oops, I broke the ring…
9. Place breaded onion ring on baking sheet. Repeat until all onion rings are breaded.
10. Spray the onion rings on the baking sheet with cooking spray. PAM works. Flip over and spray the other side of the onion rings.
11. Bake on one side for about 8 minutes. Check to see that the onion rings haven’t turned too dark. If they are, it’s definitely time to flip them.
12. Flip and then bake another 5 minutes. give or take depending on the onion rings’ appearance.

Onion Rings Done!
Too bad… after one day, these rings still get soggy too just like fried onion rings. But, these are tasty! The flavor is slightly different from fried onion rings!


